
Description
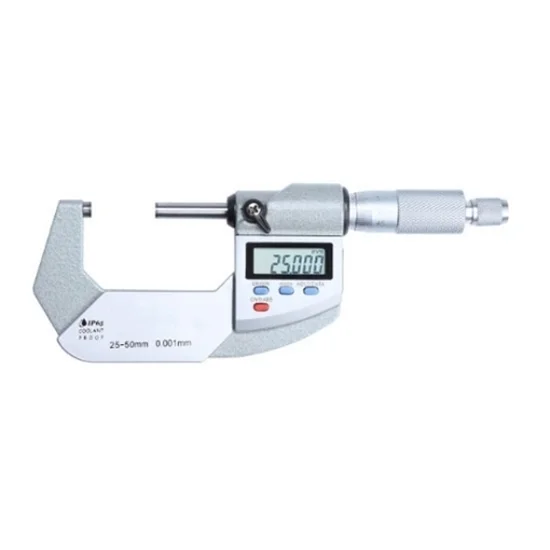
The electronic digital display micrometer uses a 3V large-capacity battery to ensure long-term measurement work, with a measuring range of 1~2 inches and an accuracy of 0.00005 inches. The digital outer diameter micrometer has mm/inch conversion/zero function for each position. Easy to use, suitable for novices and professionals alike.
Specification
| Model | ATO-JZ25-50 |
| Digital Display Scale | Digital display + scale |
| Range | 25~50mm (1~2 inch) |
| Resolution | 0.001 mm (0.00005 inch) |
| Accuracy | ±0.002mm (0.00005 inch) |
| Metric to English Conversion | Yes |
| Home Position Measurement | Yes |
| Data Hold | Yes |
| Power Supply | LR44 button cell |
| Out of Tolerance Alert | Yes |
| Scale Body Quality | High quality steel |
| Product Process | Surface spraying |
| Scale Process | Laser scale |
| Packaging | Drop-proof blow mold box |
Set zero
- Wipe the probe measuring.
- Probe closure.
- Lock the screw with the stopper.
- Use a wrench to pull the fixing sleeve until the zero line is aligned.
Details
Tips: How to use a digital micrometer?
- According to the different tolerance levels of the parts, the correct and reasonable use of a digital micrometer is.
- Before using a digital micrometer screw gauge, first, use clean gauze to clean the micrometer, and check whether its parts are flexible and reliable, that is, check the micrometer cylinder rotation and micrometer screw movement should be smooth. If it is a digital micrometer scale to see whether the display shows the number of normal or no jumping phenomena.
- Check the zero position, turn the differential cylinder on two measuring surfaces gently contact no light leakage, then the differential cylinder on the zero line should be aligned with the fixed casing, and the end face of the cone of the differential cylinder should be tangent to the fixed casing zero line.
- If not to zero position, then use clean paper to mop clean the measuring surface; or a hexagonal wrench to turn the fixed casing so that the zero point and the mark line alignment, and then the fixed casing in the fixed screw lock. Digital micrometer then press the function key “0” button. Here return to zero also with each person’s operating strength.
- In the measurement before, if the parts are dirty, the parts must be measured surface wiped clean, so as to avoid dirt affecting the measurement results.
- When measuring, make the axis of the micrometer screw and parts measured in the same direction, not tilted; then turn the differential cylinder, when the measuring surface will be in contact with the parts, should be changed to turn the ratchet that is the force measuring device, until the ratchet issued a “click” sound. After the ratchet makes a “click” sound, then the reading can be taken. At this time it is best to read directly about the measured parts.
- When reading the application of the locking device measurement, make the micrometer screw axis and parts measured in the same direction, not tilted; then turn the micrometer cylinder, when the measuring surface will be in contact with the parts, should be changed to turn the ratchet wheel that force measuring device, until the ratchet wheel issued a “click” sound, then you can read the number. At this time it is best to read directly about the measured parts. If you must take down the micrometer readings when the application of locking devices to lock the micrometer screw and then gently slide out of the micrometer.
Reviews
There are no reviews yet.